The Diamond Atomic bow is perfect for getting kids into shooting bows. Many parents out there have bought their sons and daughters this perfect bow for youths and raved about how wonderful it was for their children! Just take a look at some of the pros of this bow:
Adjustability ranges are excellent
Great for young shooters getting into the sport
Comes equipped with everything that’s necessary to operate the bow
Adjustment is marked
The limbs won’t back out completely
The Diamond Atomic has a lot of adjustments and is designed to change with the person who’s shooting it. With the draw weight adjustment between six and twenty-nine pounds, the Atomic is an excellent choice for those who are just beginning their bow excursion. The limb bolts don’t back out, so there isn’t a need to worry about adjusting the limbs too low. It also comes with an adjustable draw length that’s easily changed by rotating from twelve to twenty-four inches using the quick reference marks for exact movements. Weighing just shy of two pounds and measuring twenty-four inches AtA, this is a perfect bow for beginners. Some might have a hard time with the two hundred dollar investment, but the bow is of high quality and will grow with the child that’s learning how to use it.
Finish
The Atomic is available in Blue and Black Graphite Limb for boys and a Black and Pink Graphite for girls. Both of them look awesome and are in no way designed to look like a child’s bow. The Atomic is the real deal, and the finish looks just like an adult’s version.
Factory Installed
For just $199, the Atomic also comes fully equipped with everything it needs to be shot. It has a three pin sight, a two piece three arrow quiver, a full capture rest, and three carbon arrows. The once piece quiver might have been better for a youth bow because a two-piece has to remain attached at all times, but it’s still adequate. The only thing missing from the package is the release and the target. It’s really an outstanding value.
Riser
The rise is meant to look just like the adult version. Diamond did a great job when they machined the bow to look as real as possible. The riser does have a spot for a front mounting stabilizer, and also for a two-piece quiver.
Grip
The composite grip is nothing to write home about. It tapers somewhat to aid in the right hand placement, and will more than likely be warmer than the riser in the cool fall weather, but it doesn’t really stand out as being something great. Shooters are able to put their hand properly on the grip for good accuracy, but something about it doesn’t quite feel comfortable for some.
Limbs
The limbs are compact in make and feature some simple graphics. They’re adjustable from two to twenty-nine pounds and have an anti-backout system to prevent the user from being injured by the limb bolts being too loose. This adjustment range is great for getting kids started and growing with them.
Eccentric System
The cam system has a twelve-inch draw length adjustment that measures from twelve to twenty-four inches with a rotating module and doesn’t need a press. There is also the option of the Atomic to be set for a no let-off if that’s desired. The dual cam technology is easily drawn and holds at full draw to help boost confidence in young shooters. The cam also has markers for adjustment for easy reference.
Draw Cycle
The nice thing about the Diamond Atomic is that it has the ability to change easily to fit a variety of shooters. The cam is smooth drawing and easily held. For a beginner’s bow, the Atomic has everything and does everything you’d want it to do.
Usage Scenarios
It’s a starter bow and an excellent one. Kids who are able to pull over thirty pounds have a lot more options available to them. But, those who are starting out have fewer options to choose from, and kids who want a bow that’s like their parents will love the Atomic.
In Conclusion
As a starter bow, the Atomic is hard to beat. Archery is an excellent sport and the experience of passing on this tradition from one to another is one of the best parts of it. The Atomic is designed to look like an adult compound bow and does that extremely well. It’s adjustable for just about any shooter, and it will grow with the shooter as they age.
Overall, the Diamond Atomic is an excellent choice for kids!
If an individual is new to the art of archery and has recently purchased or plans to purchase a compound bow, the archer will want to get high-quality arrows to use with the hunting/archery equipment. A number of considerations go into choosing arrows for a compound bow, all of which are defined by individual need. An archer has to figure out arrow length through full draw measurements. Along with arrow length, the archer must consider arrow weight. Finally, the purpose the archer is using the arrows for, whether target practice, tournament participation, or the actual hunting of prey, plays a role in what arrows are most appropriate for use in a given situation.
Arrow Length & Full Draw Measurements
The length an archer requires is different for every individual. To determine the length of the arrows an archer needs, it is necessary to take up the bow and a long arrow with a nock on it. Someone has to assist the archer in measuring the length of the arrow once the archer establishes full draw.
The archer then holds the bow up with a non-dominant hand. The next step involves placing the nock up against the D loop on the bowstring and pressing it into position until a click is heard (this is the nocking point). The length of the arrow, also called the shaft, is extended forward, and placed on the arrow rest that is perpendicular to the string and accessed just a bit above the bow’s handle within the area of the bow riser.
The archer’s draw helps in determining the arrow length. It then becomes necessary for the archer to draw back the string and arrow to a full draw: The bow string is at full tension; the archer’s elbow locks back, and the bowstring with arrow nock locked into place are stretched back far enough to touch up against the cheek, nose, and mouth of the archer. The full draw occurs on the shooter’s dominant side since the non-dominant hand is holding the bow parallel to the ground and straight out from the chest. Even if the archer does not have an arrowhead on the arrow, it is important to keep the bow in full draw pointed away from other people.
With the bow in full draw, the individual assisting the archer uses the tape measure to determine the length of the arrow. The assistant measures by starting at the nocking point near the face of the archer and measures to the position on the bow where the deepest section of the grip is located. This is where the arrow meets and crosses the bow’s riser. An archer can find this point by eyeing it as it is about one inch away from the tip of the arrow or the archer use a bow square to ensure the greatest accuracy. The measurement does not take into consideration the measurement of broadheads or field points.
The person taking measurements can mark this spot on the arrow. After full draw measurements, the archer can set the bow facing down before attempting to remove the arrow from the nocking point. Now the archer can measure from the bottommost portion of the nock to the end of the arrow where the archer’s assistant put the mark during the full draw measurement session.
The archer can then shop for arrows based on the final measurements with the consideration of arrows that range anywhere from the exact measurement to one inch longer than the measurement collected. When buying arrows, the location selling the equipment will present the consumer with a chart so the archer can choose the correct arrow length. It will be necessary to add between 0.5 inch and 1.0 inch to the initial full draw measurement. For instance, if the archer has a full draw measurement of 29 inches the correct arrow length is then 29.5 inches to 30 inches in all. Adding the extra half to full inch allows the archer to buy arrows capable of clearing the forward-most section of the bow’s arrow shelf.
Measuring Full Draw without a Bow
An archer can measure full draw in the absence of having a compound bow present. This type of technique is useful if the archer has yet to by a bow for the first time, and would like to make a purchase of a bow and arrows simultaneously. Like the above-mentioned full draw arrow measuring method, the individual will require some assistance from another who can collect the necessary measurements.
First, the archer needs to stand up straight with the arms down at the sides. The shoulders should be back, and the archer will need to have on loose fitting, lightweight attire. The archer can then spreads arms out, one to each side, so that the entire body forms the letter “T.” The archer’s arms remain out, straight, and parallel to the floor. The elbows must remain unlocked. The assistant can take the measurement from the tip of the middle finger on one hand to the tip of the same finger on the opposing hand. The figure noted is then divided by 2.5 inches to determine arrow length. For instance, if the fingertip-to-fingertip measurement is 70 inches, the arrows one will require are at least 28 inches in length. It is a good idea to add 0.5 to 1 inch extra when considering the length of arrows one needs.
Arrow Weight
To know how to choose an arrow weight, one needs to know the draw weight of the bow. In considering the weight of the arrows one chooses, the weight will include the field point, nock, insert, vanes, and the arrow shaft. The ideal weight for arrows one plans to use for practicing with a target is between five and six grain per pound of draw weight. If the bow has 60 pounds of draw, then the weight of the arrows one needs for shooting are 300 to 360 grain.
For hunting purposes, the weight of the arrows will be a bit different. Instead, the archer will need arrows that are six to eight grain per pound of the draw weight. Thus, the arrow should weigh 360 to 480 grain when using the arrows for hunting prey. The arrows used for shooting at targets are lighter than those one would use for shooting at an animal simply because they fly straighter and are, therefore, best in tight shooting areas such as those found in a shooting area. For hunting, an archer relies on heavier bows because their extra weight helps in creating additional kinetic energy. The extra energy lends to the ease of penetrating flesh.
Arrow Material
Some of the most common arrows used for different purposes, such as target shooting and hunting, include arrows made of carbon, aluminum, and wood. Copper arrows are also available but are quite expensive and not necessarily practical. A carbon arrow does not have a lot of bend to it and once it hits something, it will not bend easily: This means this kind of arrow has a greater likelihood of snapping and creating dangerous shards that can injure the archer if the individual is not careful.
Arrows made of wood have been around for hundreds of years. The wood arrows today are for use with lower power recurve bows and long bows. These types of arrows are not good for bows with a higher power recurve or for use with a compound bow since wood is more likely to break. Wood arrows, unlike aluminum or carbon arrows using plastic vanes for flight, use features for flight instead.
Aluminum arrows are a bit heavier than the carbon arrows on the market. The aluminum material makes the arrows less stiff when compared to carbon options, and the arrow is a bit heavier in weight than other arrow alternatives. The aluminum arrows are a great option for the compound bow. They are heavy and longer lasting. The arrows can also be cut to size if necessary.
Learning how to shoot a compound bow will take some considerable patience and practice. Unless a person already has significant experience with archery, there are several steps the individual needs to master to shoot a compound bow correctly and with any amount of accuracy. For starters, if an archer is new to using a compound bow, they have to learn all of the parts of the bow and how they work. The bow parts are too much to cover a work of this scope, but for a great introduction into the anatomy of a compound bow, read ShootingTime.com’s “Parts of a Compound Bow.”
Once familiarized with the setup of a bow, it’s time to start practicing bow set up and shooting. Not all archers shoot bows alike. In mastering the steps below you can establish consistency in your form, style, and shooting accuracy.
Mechanical Release
The first step an archer takes when preparing to use a compound bow is to attach a mechanical release. The mechanical release, also called a release aid or “release,” is a piece of equipment that should not be underestimated in its importance. An archer uses the release to ensure the accuracy of his arrow’s trajectory. This piece of equipment is fitted with a trigger and allows the archer to forgo using his fingers to release the arrow. The end result of its use ensures a speedier bowstring release along with a minimal amount of torque placed on the string, thereby lending to greater firing accuracy.
An archer uses Velcro® straps and connects the release to his dominant hand. The release may be black or some are made with camouflage materials. The piece has a section that wraps around the wrist and hand, a small metal arm, and a moveable-like crimp section that grabs onto the bowstring.
Releases are manufactured in different styles: A caliber release is considered among the best options. When the trigger is pulled, it opens both sides at the same time. If the archer uses a caliber release, a loop can be added to the drawstring at a position right at the D Loop or slightly below the nocking point. The loop allows for ease of connection between the release and the bowstring. The loop, when pulled back does not establish an undesired angle and keeps the bowstring perpendicular to the arrow. When the archer pulls back the caliber release, the individual can pull the trigger with a mere motion of the finger: Doing so releases the crimp from the loop on the bowstring so that the arrow is also released.
There are three types of releases, with the caliper release most preferred over the t (Thumb) release, and the back tension. The thumb switch has a lot of moving parts making it difficult to master. It is easier to learn how to use than a back tension release. While the back tension releases are quite simple in terms of structure, the pieces are also quite difficult to use. Whatever release you choose will take practice to master.
A release is not a necessary piece of equipment since a compound bow can be fired with ease by using the fingers. Many archers prefer to use a release in an effort to thwart an unintended discharge of the arrow from the bow. The release also serves as a tool that minimizes finger discomfort. Using a release has myriad benefits. The archer will run a lower risk of dry firing and causing unintended equipment damage or self-injury. Using a mechanical release will also lend to the consistency of release. A release aid with a wrist strap serves as a way of balancing the tension produced by the pulled back bowstring between the fingers and arm muscles.
Releases with wrist triggers are the most common and are ideal for recreational shooting and hunting. Handheld T-handled releases take more finger strength to use and are more commonly used for hunting from a tree stand or when taking part in archery tournaments. Check out this Howcast video on how to put on a bow release for more information:
Nocking an Arrow
Nocking the arrow is a simple process. A nocked arrow contacts the bow at two points, the rest, and the string. This ensures that at no point during the shooting process does the arrow contact any other surface, which would send it off course.
Begin by placing the arrow on (or through) the rest. If it is a “biscuit” style rest like the one in the photo, the arrow will slide through the bristles and seat its self. With any other arrow rest, the arrow will sit atop the rest. Many archers prefer the “biscuit” style because the risk of the arrow falling off the rest is eliminated.
The nock is the portion of the arrow that attaches to the string at the nocking point. When an arrow is nocked properly, it will make contact with the compound bow in two places: The string and the rest. A properly nocked arrow is imperative as it ensures the arrow does not come into contact with any other surface or part that might otherwise deflect the direction of the arrow’s trajectory. Just above the grip of the bow is an arrow rest. The archer places an arrow through or on the rest (depending on the bow’s design). If the bow is fitted with a biscuit-style arrow rest, the arrow naturally seats itself when the archer slides the arrow through the arrow rest’s bristles. With other arrow rests, the arrow sits right on top of the rest and may fall from its position: This fact alone makes the bristle-style arrow rests more desirable.
Arrows are fitted with colorful vanes or plastic fins: These same components are imitations of fletchings made from turkey or goose feathers. On an arrow, there are three vanes, one of which is the “cock” vane or feather that rests at a 90-degree angle from the nock. The cock vane/feather is often the most colorful and vivid. The vane is also nocked so its shot remains uninterrupted by undesired contact with the bow.
The arrow should rest about 1/8 of an inch over the precise perpendicular position. Some arrows feature four fletchings, all of which are symmetrical, and so there is no special positioning of the vanes in question. When using arrows with three vanes, the archer makes sure the vane with the most vibrant colors is pointing upward. The archer then takes the end of the arrow and the plastic, pre-grooved nock, and lines it up with the compound bowstring. The nock is pressed back into the bowstring until a clicking sound is heard. If using a mechanical release with a D loop in the bowstring, the nock is centered on the string along the backside of the D-shaped loop: This is called the nocking point.
Establishing the Center Shot
Next, the center shot must be established. The archer must position the arrow in the center of the power stroke of the string: The string travel position between full draw and resting draw. The arrow must remain in front of the bowstring as the string moves forward in a straight line. Thus, the bow and bowstring must be aligned. The string is aligned with the center of the bow riser, limbs Once this is accomplished, the archer has established the center shot. For more information, see this video:
Proper Form
The way an archer holds the bow and the archer’s stance are important. How the archer stands in relation to where his target is located: This is archery stance and form. The archer must stand perpendicular to the selected target. The archer’s shoulder should be aimed at the target with feet shoulder-width apart. One of the shooter’s feet should be positioned a bit more forward than the other. The stance needs to be balanced and enough clearance needs to be present along the archer’s chest and bow arm.
The archer will begin with the bow in front of the body and with his fingers on the bowstring in a resting position. The shooter loads the bow with an arrow from the resting position. Before loading the compound bow, the archer always makes sure that no one is in the way or in the direct line of the bow’s path of trajectory: This helps in avoiding the possibility of accidental injury. Once in resting position, the archer can remove one arrow from the quiver and positioning the nock against the bowstring and listens for the “click.” The other end of the arrow is placed on the arrow rest. The arrow is nocked. With the arrow nocked, it’s a good time to attach the mechanical release while holding the trigger in a position that will prevent accidental firing. The center shot is established.
The Draw & Release
An archer draws up the bow so the arm holding the bow up is parallel to the earth. He pulls the drawstring straight back bringing the string toward the face, jaw, and ear while also pushing the bow out with the hand he is using to hold up the bow. An effort to rely on one’s back muscles over the arm muscles is needed, as it makes for smoother shots and a reduction in muscular strain and fatigue. In the draw position, the hand should rest lightly around the bow. Over-gripping the bow leads to excess torque and potential misfiring.
The archer must draw the string to the cheek: This is known as the anchor point. When shooting a compound bow it will take some practice, but the archer must learn how to draw the bowstring back to the same position every time the bow is used. To ensure the accuracy of the shot, archers often allow two parts of the face to touch the bowstring when it is drawn back: the nose and cheek. After achieving the appropriate stance, the shooter can align the bow’s sight on the selected target and slowly squeeze the trigger of the mechanical release. The archer will also have to follow through on the shot taken: This is achieved by remaining focused on the target ahead. If you manage to get a tight arrow pattern with repetitious shots, it means you’ve got the art of shooting a compound down to a science! For more information on the stance and the draw of a compound bow, view the following video by Colorado Outdoor Magazine:
The Martin Tiger bow is for youths between the ages of four to eight years old. It’s an excellent, lightweight bow, which is imperative for younger children. It’s considered one of the safest bows available on the market when it comes to children, has a built-in, adjustable sight, and doesn’t need the draw length adjusted. This bow is very affordable, so it’s perfect for kids who are just starting to get into the sport!
This bow has been manufactured for over ten years now and comes in two different styles. The original style began before 2007 and comes with the Mini Z-cam, and the new Martin Tiger, manufactured in 2008 to the present day, comes with the T-Pro cam. While both of them are designed for small children, they’re different in terms of specifications, design, and suitable ages. This review is going to concentrate on the older version of the bow.
Professional Review
As already mentioned, the Martin Tiger is an excellent bow for children between the ages of four and eight years old and is considered one of the safest bows on the market. The bow is outfitted with a shoot-through machined plastic riser that’s sophisticated and reliable, even if it’s not made from aluminum. Because it comes with a shoot-through riser, both left and right handed children are able to shoot this bow. In addition, it comes with a built-in, adjustable sight with one pin, which is nice because you don’t need a separate sight for this bow then.
Safety
Experts and parents both agree that the new Martin Tiger is one of the safest bows on the market due to the riser design. The arrow capturing shoot-through system keeps the arrow facing the right direction and prevents the arrow from falling when the bow is moved from side to side or up and down.
Draw Adjustments
It’s imperative that you know that the limbs are attached to the riser without using the usual limb pockets and limb bolts. Because of this, the draw weight is adjusted differently than the average bow. Specifically, it’s made by loosening the slip knot and moving it to one of the three knots that are available that correspond to the draw weights of ten, fifteen, and twenty pounds. The knot closest to the upper wheel is utilized to set the draw weight to ten pounds, and the next two knots are used to set them to fifteen and twenty pounds respectively. It’s recommended that you use a bow press to compress the limbs before the draw weight is changed.
Eccentric System
The eccentric system on this newer bow is flexible due to the bow being able to be shot at any draw length from fourteen to twenty-four inches without an adjustment or an extra module. The T-Pro cam system gives the bow a let off of forty percent. The design helps to bridge that gap between the versatility of not having to adjust the draw length and a normal let-off.
Ages
Because of its minimum draw weight of ten pounds and low mass weight, the new Martin Tiger is suitable for children who are in the smaller range. That’s why it’s best for the kids in the age range of four to eight. This range is still an estimate, though. While it’s good for the majority of children, it’s not unusual for a child to be smaller or bigger than average, so some can begin shooting this one earlier while others might still have to wait.
General Public’s Reviews
Reviewers on Amazon agree that this bow is excellent for children under the age of ten. They state that the bow comes with everything that’s needed in order to operate it, and Martin Archery has excellent customer service if anything happens to go wrong. Parents agree the bow is safe, effective for beginners to the sport, and their children all love it!
Conclusion
The Martin Tiger is an affordable youth bow that’s best for small children. It has been manufactured for more than ten years with two different styles, the original with the Min Z cam that was made before 2007 and the newer T-Pro Cam style that was manufactured after 2008. While both are suitable for small children, the newer one is even more so. The new modifications to the Tiger make it one of the best out there for kids in terms of safety.
In addition, this bow has received a lot of positive feedback from many parents who say that their children enjoy shooting the bow, and there’s nothing better than having kids enjoy the sport! While the factory strings could be of better quality and the draw weight adjustment is coarse-grain, overall, this is an affordable and suitable bow for small kids. If you want to see someone shoot this bow, check out this video:
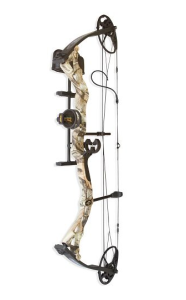
The Diamond Infinite Edge is one of the best-selling bows on the market, and for good reason. It’s very adjustable, a great starter bow, is very light for hunters, and is great for those who like to target shoot. The only bad thing about it that many complain about is the square-shaped grip, but we’ll discuss that in a bit.
The Diamond Infinite Edge is made by Bowtech, one of the best manufacturers of bows in the world. If you want a compound bow for someone just getting into archery, especially younger archers who are likely to grow and get stronger as they use the bow. The range of adjustable settings on this bow is staggering, and you could get it for a five year old child and they can still use this bow ten to fifteen years later. At the same time, the bow would be great for an adult shooter who wants some flexibility in their bow’s settings.
Cams
This bow is based on a dual cam eccentric system. These cams are oblique and the movement is synchronized for a perfectly straight trajectory. The cam system on this bow is of very high quality. The cams are smooth, which sacrifices a bit of FPS in exchange for a beginner-friendly draw cycle. It’s perfect for those who are just learning to shoot because they can easily get perfect form. The cable slide is smooth, sturdy, and won’t pinch the cable.
What’s great about this bow is the diversity of the draw weight and the length settings. The draw length can range anywhere from thirteen to thirty inches, and the weight can be set from five to seventy pounds. Unless the shooter is a very tall male, there isn’t a person who can’t use this bow.
Changing the Draw Length and Weight
There are three settings, A, B, and C. C being the lowest range out of all the settings. In order to change the setting from C to B, you need a bow press. Just take the bow to a shop and they’ll help you out. Changes are, if you bought this bow for a child, the draw length and weight will need to be changed in their lifetime.
Shooting Speed
The IBO speed for this bow is 310 FPS, and all ratings assume there’s a setting of seventy draw weight, thirty draw length, and 350 grain arrows. The lower the settings or the heavier the arrow, the lower the FPS is going to be.
Keep in mind that if this bow is for a beginner, shooting speed is not that important. They should focus on accuracy and proper form at short distances before they begin hunting, which is when FPS will matter more. At the point in time when the archer will be going out with the bow to go hunting, the higher settings will be used and the FPS will be solid.
KE
KE stands for Kinetic Energy, and is only of a concern when someone is going hunting for game animals. At the lower settings, the KE of this bow is so low that harvesting the smallest of game is not going to happen. However, at the higher settings, it’s a powerful bow that will take down some very large game.
Draw Cycle
The cams are not aggressive, the ramp up to peak draw weight will happen slowly and smoothly, and this leads to no noticeable humps in the cycle. This smoothness is true for regardless of the settings on the bow, which means that the draw remains consistent throughout the years kids practice shooting and the time that an adult needs in order to begin.
Noise and Vibration
Because it’s for younger beginner archers, the Infinite Edge needs to be light-weight so it doesn’t overtax a child’s muscles and make it uncomfortable for them to shoot for a long period of time. Because of this, not a lot of vibration and noise dampening accessories are installed on the bow because it would increase the weight. Even more so, a quiet performance is important when hunting, and young children won’t be going hunting.
However, the bow is pretty quiet as it is. It’s not as quiet as a more expensive compound bow out there, but it’s still quiet enough that it’s not annoying. There is a string stopper built into the riser that eliminates string vibration, but there is almost no hand-shock, which is a surprise for some.
If you need to silence the bow further, get a stabilizer.
For Hunting
The bow was not really made or equipped for hunting, but at the higher settings it can be used for that purpose. At the maximum settings, it’s able to take down the largest game in North America, and at less than twenty-five feet per pound it can take out some small game like rabbit and turkey.
Just be sure to add some extra silencing accessories if you want to take this bow hunting.
Value
The main selling point of this bow is it has a wide range of adjustability and it’s a beginner-friendly bow. It’s a one of a kind bow that can grow with the beginner all through their stages and last them a very long time. If you’re purchasing this bow for a child, then this is an excellent choice because it will last them until they’re an adult. If you’re purchasing this for an adult male, you might want to look at a few other choices.
Conclusion
Amazon reviewers and parents across the globe who purchase the Diamond Infinite Edge have to agree that this compound bow is excellent for children and adults alike. It’s of great value for the money, and grows with the beginner until they’re ready for a slightly more advanced bow. We mention this bow frequently in our guide to buying the best compound bow, and it’s for good reason! This bow truly is one of the best.
Bows and arrows have been in use for thousands of years for defense, offense, hunting, and for pleasure sport. While the bow has a rich history across the world, some types of bows have been developed and in use for far shorter a time. One such type, the compound bow, was invented in modern times and features modern technology. The recurve bow, however, is also a popular bow and was first designed thousands of years ago. These two bows are widely used today for various activities that suit each bow’s capabilities.
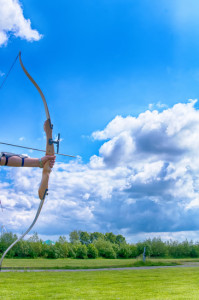
The Recurve Bow
The classic recurve bow may be described as a bow that has limbs that curve away from its user when not in use. The recurve bow is known for its string that rests across the curved limbs; this demonstrates the depth of the curve of this bow. As the archer knocks an arrow, the string is pulled back, removing it from resting on the limbs as they are fully extended. Many cultures used composite recurve bows, or bows made from layering multiple materials in order to increase strength, including the Huns, Persians, Greeks, Turks, Mongols, and Chinese.
In addition to these warrior cultures, many more civilizations used these weapons until utilization of firearms during battle made archers obsolete and unneeded.
Modern recurve bows are still used for a variety of activities. The recurve bow has also attained new popularity from its use in the Hunger Games franchise where its female protagonist uses the recurve bow as her weapon of choice to provide for her family, and ultimately in a battle to the death. This proves the recurve bow has not been lost to the modern sportsman/woman and is a weapon that has held its own over time.
Current uses for recurve bows include target practice, sport archery, and different hunting applications. Although some professionals would recommend a compound bow for hunting game, expert hunters across the country argue that any animal can be successfully hunted with a recurve bow. Because the recurve bow is better for on-the-fly targeting for animals that may be moving, it also does better with small game such as:
Rabbit
Beaver
Wild turkey
Small game birds
The recurve bow is also the bow of choice at the Olympic Games and has been since the sport began in the games in 1900. In more recent years, bow-fishing has popped up in popularity where the archer spears a fish with an arrow that is attached to a reeled line. The fish is then reeled up to the boat and netted. This sport is relatively new, but has gained popularity recently and is useful in catching a variety of fish such as carp, grass carp, bighead carp, alligator gar, and paddlefish.
This bow undoubtedly has many uses; here are some of the pros to using a recurve bow:
Cheaper price
Made from more natural materials
Less complicated
Easy to maintain
No serious adjustments needed
Simplistic shooting style
Even though there are many pros, there undoubtedly are bound to be cons as well. Some of the possible downsides to using a recurve bow include:
Takes more skill to make accurate
Can be less powerful
Expert level required for difficult shots
Now that we have discussed the pros and cons of the recurve bow, we will take a closer look at the compound bow, and its applications versus the recurve bow.
Compound Bow
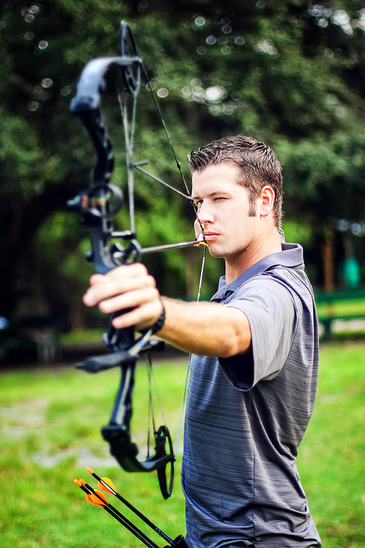
The compound bow is a relatively modern bow (first developed in 1966) that uses a system of cables and pulleys to bend the limbs under tension. This type of bow is popular with big game hunters and can be used competitively. Compound bows can be extremely accurate, as well as more powerful than other bows. The pulley system effectively allows the archer to use less strength to draw the bow, storing more energy in the stiffer limbs with less effort.
This bow is popular with hunting of all game types. It is very quiet, allowing for hunter’s to surprise even the most noise-sensitive animals and it doesn’t clear the forest after a shot like a firearm does.
Some of the hunting applications for a compound bow include:
Deer
Boar
Bear
Moose
Caribou
Large game
In addition to game hunting, the compound bow has also erupted into the bow-fishing world as the bow of choice for salt-water fishing. With their superior power, compound bows have proved useful with catching stingrays and different types of sharks.
There is no doubt that the compound bow is a powerful and versatile weapon. There are many other pros to using a compound bow:
Sturdy construction
Less skill needed to operate
Powerful force
Very accurate
Much quieter than other weapons
Lightweight
More technologically advanced
Despite the many advantages, there are a few cons to using this type of bow:
Lightweight design can interfere with accuracy
More moving parts can mean more breakdowns
Harder to repair
Cost more on average
More expensive to maintain
The compound bow is definitely a powerful weapon and can be used in many applications. The modern design has helped bring a new generation of archers into the world. By enhancing this basic weapon with technological advances, it has brought this weapon into the present; it is no longer a weapon of the distant past.
Compound vs. Recurve Bows
So who wins the battle between the two types of bows? Neither! Both bows are strong and reliable contenders and are useful in their own ways. The recurve is the best for small game hunting, bow-fishing, and general use by a more advanced archer, whereas the compound bow is better for large game hunting, sea bow-fishing, and is popular with archers of all ages and skill level.
Many of the links that you'll find on Archer Den link to products on third party sites. If you choose to purchase a product after going through one of these links, we will receive a small sales commission at no extra cost to you. We thank you for supporting our business!

 The Diamond Atomic bow is perfect for getting kids into shooting bows. Many parents out there have bought their sons and daughters this perfect bow for youths and raved about how wonderful it was for their children! Just take a look at some of the pros of this bow:
 The classic recurve bow may be described as a bow that has limbs that curve away from its user when not in use. The recurve bow is known for its string that rests across the curved limbs; this demonstrates the depth of the curve of this bow. As the archer knocks an arrow, the string is pulled back, removing it from resting on the limbs as they are fully extended. Many cultures used composite recurve bows, or bows made from layering multiple materials in order to increase strength, including the Huns, Persians, Greeks, Turks, Mongols, and Chinese.
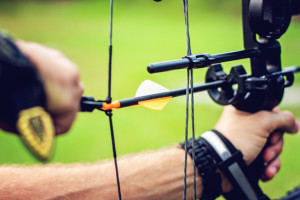 The
The