How to Tune a Recurve Bow for Accuracy

If your recurve bow is not tuned or poorly tuned, it ensures two things: Your bow and arrow shots will not be accurate and your will have considerable difficulty repeating the same types of shots with any kind of consistency. To ensure the greatest amount of accuracy when bow shooting, you will have to tune the bow correctly. The accuracy of your shot is highly dependent on three factors: bow tuning, biomechanics, and shooter’s attitude at a percentage of 10%, 20%, and 70% respectively. Even when assigned the smallest percentage in terms of importance, it does not lessen the need for bow tuning to ensure the greatest possible shot accuracy.

Tuning a Recurve Bow in Brief

Bow tuning requires several steps. First, the archer has to adjust the string height from the bow’s riser, which should measure between 7 to 9 inches from the riser to the area where the bow’s grip is located. Once the string height is located, the archer then takes a number of test shots with arrows that are fletched and not fletched. How the arrows hit the target gives the archer considerable insight into how the bow is functioning and what kinds of adjustments must be made to improve the overall accuracy of the shot. The nock height also has to be perfected with you are tuning a recurve bow as it lends to the ease of arrow release and the accuracy of the shot.

Establishing Your Brace Height

The brace height is the distance between the middle of the bow string and the throat or grip area of your bow. Often times the bow manufacturer will supply you with information on how to establish the ideal brace height for your needs. To adjust the brace height and to make it longer, you will have to take off the bow string by removing it from one of the bowstring nock and twist the string to shorten it. Once you’ve twisted the string, you then replace the end of the bowstring in the nock on the bow. After establishing the initial brace height, you have to take a few shots with an arrow to see how it feels.

If the height is set too low, you will feel a vibration in your bow’s limbs and the bow string may slap your forearm after you fire off a shot. The bow can also prove to be a noisy shot if the brace height is not established with accuracy. You will have to continue to make adjustments to the height until all the latter mentioned issues are resolved. Three to five twists of the bowstring in an effort to shorten it with each attempt is sufficient. You will be looking for what expert archers call “the sweet spot,” where the noise vanishes, and the limb vibration and hand shock also disappear. Once you achieve this brace height adjustment, you’ve tuned the brace height correctly.

Setting the Bow’s Nock Set & Bare Shaft Tuning

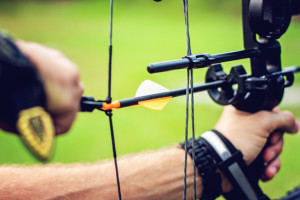
To set a bow’s nock set you must begin by holding the bow facing the ground. An arrow is fitted in the nock and is also pointed toward the earth. Tap the bowstring. When you do, the arrow should drop clean away from the bowstring with ease. If the nock does not free from the string that quickly, you can use a small piece of sandpaper of 150 or 220 grid, you can sand the nock a bit to loosen the connection. Other options include taking plastic nocks and placing them on the shaft of the arrow and putting them in boiling water all the way you to the base of the arrow groove: Do this for the count of ten and remove them from the water. Put them onto the bowstring and allow the over tight nock to sit for a half minute: This will loosen the nocks so they fit just right.

Expert archers sometimes use a T square to set the nock set and positioning of the arrow. To do this, you will have to take a number of shots with the bow and arrow to see what shot and position get you the greatest amount of accuracy. You will have to shoot fletch and unfletch arrows for comparison. The shots you make can tell you much about the condition of your bow set up.

You will be taking practice shots at about 10 meters from the target. If your fletched arrows are higher than your unfletched arrows when they hit your target, it suggests your nock is too high. If this is the case, adjust your setup about 1/32 of an inch and try your shots again. You will continue to repeat this process until you get the shot accuracy you desire. If you are right handed and your unfletched arrows are coming up to the left of your fletched arrows, it suggests the arrows you are using are excessively stiff. If the unfletched arrows are below the fletch arrows, it suggests you have to adjust the nocking point by lowering it. If the unfletch arrows are to the right of your fletched arrows, it means the arrows are not hard or stiff enough.

To adjust arrow stiffness, you can try shooting with different arrow weights. To weaken the arrow spine you can add a heavier point to your arrow. If the arrow is too stiff, you can use a lighter point. You also have the option of shortening your arrow by 1.5 inches at a time to get the fletch arrows to align correctly.

You can repeat this process at 20 meters for the newbie archer, and 30 feet for the more experienced. The repetitious testing and adjusting leads to a finer tuning of your bow. Once completed, your bow will be tuned to ensure the best arrow flight for every shot you take.

Bow Stabilizers

For additional stability and balance, archers will use a stabilizer on their bow. The stabilizer helps in diminishing the effects of vibration caused by movement, which is capable of causing deviations in the direction of your arrow when it is in motion. Archers can use a v-bar stabilizer to add additional weight in the region of the riser and grip. The stabilizer must be away from the bow’s handle however in order to supply the desired balance and stability it is capable of providing. If the stabilizer is positioned behind the bow’s grip, it makes for more mass being added to the bow’s structure and, in turn, ends up neutralizing the stable elements the archer is trying to achieve. The stabilizer needs to add the least amount of mass possible as a lighter bow mass lends to greater control when it’s windy outdoors.

Some archers also opt for upper limb stabilizers to diminish bow vibration once the shot is fired. The upper limb stabilizers are really optional because a bow that has been tuned accurately does not demand the use of an additional stabilizing element.

Bow Tillering

When you are making a tillering adjustment to your bow, you are establishing a balance between the bow hand pressure and the string finger pressure or the difference between the center of the bow an above the bow’s center. Getting the tillering right ensures the bow noise is reduced, that the limbs work in unison, and that aim has greater accuracy overall.

You are adjusting the area where the arrow leaves the bow by moving the nock point. Your hand will sit at the center of the bow so the arrow is positioned above the same center. The nock point on the arrow string is also above center position. When you shoot the recurve bow, you will most likely use a Mediterranean grip where you end up pulling the bow string away and off the center point of the bow. The creator of the bow often makes the lower limb of the unit stronger for this reason, and when you are tillering the bow, you are adjusting for this difference.

To adjust a bow’s tillering, you will stand roughly five meters from a target with your bow in full draw. Close your eyes for a period of five seconds. When you reopen your eyes, your bow should still be aimed at the same location it was aimed at when you closed them. If you discover your aim is off and you have shifted up away from the target, the uppermost limb is excessively strong; you will have to lower the weight by a quarter turn and repeat the test. If your aim moves below your initial aim, the bottom most limb is too strong and you should lower the weight by a quarter turn and retry once more.

Sources:

Archery Australia’s “Recurve Bow Tuning.” PDF File/Booklet. URL: https://assets.imgstg.com/assets/console/document/documents/1213%20recurve%20bow%20tuning%20booklet.pdf.

Archery Forum’s “Tuning a Recurve Bow.” Website forum. URL: http://www.archery-forum.com/showthread.php?13320-Tuning-a-recurve-bow.

Archery Talk: Archers Helping Archers. Website forum. URL: http://www.archerytalk.com/vb/showthread.php?t=2382290.

Wendouree Archery Club Inc. “Bow Tuning FAQs.” Website. URL: http://www.wendoureearchery.com/bow-tuning.html.

THQ’s, “How to Tune a Recurve Bow.” Website. URL: http://support.thq.com/entries/43844605-How-To-Tune-A-Recurve-Bow.

How to Shoot a Recurve Bow

Recurve BowMastering the use of a recurve bow takes practice and patience. Before you can begin learning how to shoot a recurve bow, you need to be familiar with the structure of the bow and the bow parts. Once you familiarize yourself with the various bow parts, you can have an easier time understanding guides and instructions explaining how to use the bow and bow shooting techniques. Before going into the steps for shooting a recurve bow, let’s examine the anatomy of a recurve bow, the different parts of the bow, and the purpose of each part so you can have a greater understanding of how recurve bows work.

Recurve Bow Anatomy

A recurve bow is shaped like the letter D in reverse when you hold it in your hand and aim it at a target. The bowstring runs from an upper limb straight down and tightly to the lower limb. At the end of each limb is an arrow nock or self nock (depending on the bow’s design) where the bowstring fits tightly into place. The body of the bow has a recurve design, hence its name. The working limbs are affixed to a nonworking handle and grip area called the riser. The working limbs create, by design, a continuous arc that curves from the portion of the riser all the way up to the tip of the limbs. Once the archer braces the bow, the string touches the belly of the upper and lower limbs.

In the riser area of the bow, there is a sight window, an arrow self (for resting the body of the arrow when the arrow is put into the nock position), and the grip. About 1/8 of an inch above the arrow shelf on the bow string the nocking point where the arrow nock is attached to the string.

Draw Weight and Length

Now that you know the basic parts of the recurve bow, you need to consider both draw weight and length. The term draw weight refers to the amount of force you will have to use in order to draw back the bowstring to the anchor point or anchorage. The anchorage/anchor point is the side of your nose, cheek, and mouth, with the arm and elbow pulled all the way back. The best draw weight when using a bow that requires about 75 percent of your total strength to pull it back. As a newbie, you might do well with a lighter bow so you can reduce the likelihood of muscle strain or injury. Consider that a bow with a heavier weight will tire your muscles more quickly, and this could minimize the amount of practice time you can get in target shooting. If you are a youth, you might also benefit from a lighter draw weight.

Draw length is a factor used to consider the arrow length you need. For this, you will need the help of another to assist you in measuring the distance from the tip of one middle finger to the opposing middle finger on the opposite hand when you are standing with your arms parallel to the ground. Your body forms the letter “T” for the purposes of this measurement. Make sure your back is straight, feet are slightly parted, and your shoulders are back while you are being measured. The measurement is divided by 2.5 to find out the draw length. You can add up to one inch extra to get the correct arrow lengths for your needs.

Selecting Arrow Weight

The weight of the arrow will determine how the arrow flies and the amount of penetration the arrow is capable of achieving. Many arrows are crafted out of carbon or fiberglass materials so they remain quite light. Aluminum arrows are a bit heavier, so are better when hunting animals because the arrow has a better flesh penetrating potential. For target shooting, fiberglass and carbon arrows remain ideal options. You can get arrows made out of wood and copper as well, but these arrows are prone to breaking and splintering. Copper arrows are costly as well.

Equipment Extras

You may not think you need accessories, and ultimately you don’t. You can forgo accessories and simply master recurve bow shooting with a bow, arrow, arrowheads, and your own skills. However, you can really enhance your shooting experience with an investment in some simple accessories. One highly recommended extra is an arm guard. The piece of gear is placed on your forearm of the arm that you hold the bow with, and it helps protect your skin from the backlash of the bow string. Likewise, a finger tab can protect your fingers from wear and tear during practice sessions and hunting. Other shooting extras you might want to consider include a clicker: A tool that lets you know when the arrow is drawn back far enough to offer you an ideal pull. A sight can help improve your aim. Finally, you can create your own target with a couple of hay bales, or you can invest in an archery target to create your own makeshift shooting range right in your back yard.

Shooting: Stance and Form

When you are preparing your stance, you need to have your feet should width apart as you straddle the imaginary shooting line. The side of your body will face the target: Your head, shoulders, torso, and hips are all perpendicular to the target. This is when you take up an arrow, nock it by attaching the nock to the bow string, and then elevate the bow into draw position.

Note that you are standing perpendicular to the target. If you are left hand dominant than your right hip is facing the target first, and vice versa if you are right-hand dominant. If you are ambidextrous and comfortable shooting either way, it makes no difference which side you choose to put perpendicular to the target in question. Keep your posture straight and do not lean in or away from the target. As you straddle the invisible shooting line, do so while keeping your feet firmly in place. You may want to put one first about an inch ahead of the other. When you are ready, turn your head toward the target in question. Keep the rest of your body in the same position and only turn your head.

Make sure you are holding up your bow with your non-dominant hand. Keep the bow firmly in the air. Keep your gripping wrist relaxed and do not grip the bow too tensely: It will affect the accuracy of your shot. With the arrow in the nock, the rest of the arrow should be perpendicular to the ground; you need to place the end of the arrow shaft on the arrow rest.
Keep the arm holding up your bow locked at the elbow: Doing this protects your forearm during the shot and makes it easier for you to draw back the bow to full draw.

Before doing anything else, double check and make sure your path of the trajectory is free of people, animals, and other undesired targets. Using the muscles in your back instead of those in the upper arms, pull back the string to the anchor point. Hold into position and use the sight on your bow (if you have one) to take aim. If you do not have a sight, simply close your non-dominant eye and take aim by viewing your target through your dominant eye.

Shooting the Bow

You do not have to pull back the string to release it. When you are ready, simply pull your fingers from the string as gently as you possibly can; this will ensure that your shot remains straight. You are simply relaxing your fingers and letting them fall from the string rather than letting the string go or pulling back more and letting go. Remain in position until the arrow you have fired strikes its target: This gives the released arrow the time it needs to be released from the string, accelerate off and away from your bow, and it prevents accidental disruption of the shot you’ve made.

Practice

Practicing your shot is what will perfect your shot. By repeating the same actions again and again, you’ll strengthen the back muscles you need to make a good shot with the bow and arrow. You will also improve your stance, concentration, aim, and release techniques.

Additional Resources:

Archery360’s How to Shoot a Recurve Bow, Simplified. Website. URL: http://www.archery360.com/video/how-to-shoot-a-recurve-bow-simplified/.

Hunting with Andrew McKean’s, “How to Shoot a Proper Recurve Bow,” Tips for Proper Grip. URL: http://www.outdoorlife.com/blogs/hunting/2014/03/how-shoot-recurve-tips-proper-grip

wikiHow’s How to Shoot a Recurve Bow. Website. URL: http://www.wikihow.com/Shoot-a-Recurve-Bow.

How to String a Recurve Bow: Two Methods

A recurve bow is made of a curved bow arm and string that, when put together, looks like the letter “D” with the string as the straight down stroke line of the letter and the arch as the bow arm. The bow arm consists of a lower limb and an upper limb. In between both limbs, the site window is present. Directly across from a correctly strung recurve bow is the nocking point where the user of the bow connects the end of the arrow (the nock). Connecting the arrow with a nock allows you give the arrow the appropriate alignment with the bowstring.

Recurve BowThe above-mentioned description of a recurve bow is quite terse and basic. Once again, if looking at the bow at a point of rest it looks like the capital letter D. The curved part of the bow has a small part at the top and bottom of each end that curves back slightly in the opposite direction: These sections are the recurves and the areas where there is a single nock on each section for the bowstring’s placement. You will find the bow sight near the sight window and arrow rest midway between the upper limb of the bow arm and the lower limb in the area called the riser/handle. The nocking point is about 1/8 of an inch above the arrow rest that is just above the pivot point and bow grip.

There are different methods for stringing bows. If you are truly interested in learning how to string a recurve bow, it is a good idea to sample different techniques. Doing so can make it easier for you to find the method you are most comfortable using. Whatever method you ultimately decide to use, make sure you examine the condition of your bow, string, and stringing equipment (if you use any) for signs of potential damage, wear, tear, or breakage. Remedy any issues before attempting to string the recurve bow to avoid an injury.

How to String a Recurve Bow by Hand

It is possible to string your recurve bow by hand. Expert archers do not recommend the practice. You might hurt yourself and/or damage your equipment beyond repair. If you should decide to use this method, you must remember the element of risk involved in doing so. Bear in mind that if your bow is heavy this method is difficult to perform. In fact, the heavier the recurve bow is the more difficult stringing it by hand becomes.

Restring or stringing your recurve bow by hand is the Step through Method or Approach. Measuring from nock to nock, you will find a string for a recurve bow is roughly four inches shorter than the recurve bow itself. You have to put the string on backward. As mentioned earlier, examine all the parts you will be working with to rule out potential damage: Examining your bow and string is even more crucial when you are using a dangerous stringing method like the Step Through technique. Position the bottom bowstring loop inside the notch at the upper recurve section of the bow. Position the top bowstring loop over the bow itself, but also under the prefabricated notch.

Beginning with the curve of the bow pointing away from your extremities and remembering that the bowstring will be located on the side nearest to your body, place your leg through the bowstring. Doing this will cause the recurve bow to rest against the opposing foot and it creates tension. Place your hand at the top of your bow as you pull the recurve bow toward your body. You must then slide the bowstring upward and loop it through the recurve bow. To view a safe way to deal with heavy bows during the stringing process, view Scott Casteel’s video below:

Stringing Your Recurve Bow Using a Stringer

Stringers are nylon material: A desirable characteristic leading to their durability. Stringers are quite affordable, but most of all, they serve as a tool for protection against potential self-injury. It is not uncommon to receive an injury from stringing a recurve bow by hand. The string may break free from your grip and snap back at you dangerously and suddenly.

A stringer comes with a weight limitation, so you must ensure you have a stringer that can handle the weight of the recurve bow you are stringing. The recurve stringer will have two loops on it: The left loop is larger and the right loop is a bit smaller. You will slide the upper limb of the bow arm through the larger loop of the two: The arm will fit snuggly within the established groove on a small limb gripper made to wrap around the bow limb. You must slide the mildly pliable limb gripper down the bow limb as far as you can slide it until it moves no further: This is when you have established a solid grip around the bow arm.

Your bowstring will be prefabricated in a similar fashion to the bow stringer design. The recurve bowstring has a larger loop on one end and a smaller loop on the opposing end of the string. Take up the larger loop after affixing the arm gripper. You must put the larger loop of the string through the stringer’s larger loop: That is the string attached to the bow gripper and limb. Take up the same larger loop of your bowstring and position it on the upper limb’s recurve portion in the string slot. You need to bring the string down until it becomes flush to the stringer’s limb gripper.

Once you are done, working the larger loop end of your string, you can begin to do the same thing to the bottom recurve. Take up the small loop at the end of your bowstring and slide the end of the opposing bow limb through the loop. At the same time, you must make the string fit into the groove pre-cut at the recurve. Follow this maneuver by sliding the small loop of your bow stringer’s gripper over the end of the bow you are working with at the time. Again, fit the limb gripper to the bow and slide it down into position until it will move no further.

Once you have aligned, the bowstring as described above, you will need to take up the bowstring by the riser of the bow: The midsection between the upper and lower limbs. With your bowstring facing the floor, bend at the waist and lower your bow to the floor. You must place both of your feet on the bow stringer. Refrain from placing your feet on the bowstring. Once you are in position, take one arm and pull up on the bow while simultaneously taking up the bigger loop of the string and positioning it into the string groove at the end of the recurve. You can view the process through Santa Fe Archery’s video below:

The type of bow stringers you can choose from range in brand, price, color, and style. The stringers on the market today are either the saddle or double pocket style stringers. No matter which one you choose, you will still be using nylon cord. With the double pocket models, the stringer is fitted with a big pocket, crafted of rubber or leather material. When stringing the bow, the pocket slides over the limb tip to hold the bowstring into position while you are stringing the bow. The saddle type stringer differs in that the pocket that you slide over the limb has a surface that is rubber with a dimpled texture.

Sources:

Santa Fe Archery’s video “Archery Tip of the Week: How to Safely String a Recurve Bow.” Youtube. URL: https://youtu.be/bEyYnDtb7eg.

Wikihow.com’s “String a Recurve Bow.” Website URL: http://www.wikihow.com/String-a-Recurve-Bow.

Scott Casteel’s “How to String an Unstring Your Recurve Bow Tutorial.” Youtube. URL: https://youtu.be/Gak6iSjF52w.

Resources for additional reading:

Archery 360’s, “Caring for Archery Equipment

Archery 360’s videos on the art of archery.

Recurve Vs. Compound Bows: Which to Choose?

Bows and arrows have been in use for thousands of years for defense, offense, hunting, and for pleasure sport. While the bow has a rich history across the world, some types of bows have been developed and in use for far shorter a time. One such type, the compound bow, was invented in modern times and features modern technology. The recurve bow, however, is also a popular bow and was first designed thousands of years ago. These two bows are widely used today for various activities that suit each bow’s capabilities.

The Recurve Bow

Recurve BowThe classic recurve bow may be described as a bow that has limbs that curve away from its user when not in use. The recurve bow is known for its string that rests across the curved limbs; this demonstrates the depth of the curve of this bow. As the archer knocks an arrow, the string is pulled back, removing it from resting on the limbs as they are fully extended. Many cultures used composite recurve bows, or bows made from layering multiple materials in order to increase strength, including the Huns, Persians, Greeks, Turks, Mongols, and Chinese.

In addition to these warrior cultures, many more civilizations used these weapons until utilization of firearms during battle made archers obsolete and unneeded.

Modern recurve bows are still used for a variety of activities. The recurve bow has also attained new popularity from its use in the Hunger Games franchise where its female protagonist uses the recurve bow as her weapon of choice to provide for her family, and ultimately in a battle to the death. This proves the recurve bow has not been lost to the modern sportsman/woman and is a weapon that has held its own over time.

Current uses for recurve bows include target practice, sport archery, and different hunting applications. Although some professionals would recommend a compound bow for hunting game, expert hunters across the country argue that any animal can be successfully hunted with a recurve bow. Because the recurve bow is better for on-the-fly targeting for animals that may be moving, it also does better with small game such as:

  • Rabbit
  • Beaver
  • Wild turkey
  • Small game birds

The recurve bow is also the bow of choice at the Olympic Games and has been since the sport began in the games in 1900. In more recent years, bow-fishing has popped up in popularity where the archer spears a fish with an arrow that is attached to a reeled line. The fish is then reeled up to the boat and netted. This sport is relatively new, but has gained popularity recently and is useful in catching a variety of fish such as carp, grass carp, bighead carp, alligator gar, and paddlefish.

This bow undoubtedly has many uses; here are some of the pros to using a recurve bow:

  • Cheaper price
  • Made from more natural materials
  • Less complicated
  • Easy to maintain
  • No serious adjustments needed
  • Simplistic shooting style

Even though there are many pros, there undoubtedly are bound to be cons as well. Some of the possible downsides to using a recurve bow include:

  • Takes more skill to make accurate
  • Can be less powerful
  • Expert level required for difficult shots

Now that we have discussed the pros and cons of the recurve bow, we will take a closer look at the compound bow, and its applications versus the recurve bow.

Compound Bow

Compound BowThe compound bow is a relatively modern bow (first developed in 1966) that uses a system of cables and pulleys to bend the limbs under tension. This type of bow is popular with big game hunters and can be used competitively. Compound bows can be extremely accurate, as well as more powerful than other bows. The pulley system effectively allows the archer to use less strength to draw the bow, storing more energy in the stiffer limbs with less effort.

This bow is popular with hunting of all game types. It is very quiet, allowing for hunter’s to surprise even the most noise-sensitive animals and it doesn’t clear the forest after a shot like a firearm does.

Some of the hunting applications for a compound bow include:

  • Deer
  • Boar
  • Bear
  • Moose
  • Caribou
  • Large game

In addition to game hunting, the compound bow has also erupted into the bow-fishing world as the bow of choice for salt-water fishing. With their superior power, compound bows have proved useful with catching stingrays and different types of sharks.

There is no doubt that the compound bow is a powerful and versatile weapon. There are many other pros to using a compound bow:

  • Sturdy construction
  • Less skill needed to operate
  • Powerful force
  • Very accurate
  • Much quieter than other weapons
  • Lightweight
  • More technologically advanced

Despite the many advantages, there are a few cons to using this type of bow:

  • Lightweight design can interfere with accuracy
  • More moving parts can mean more breakdowns
  • Harder to repair
  • Cost more on average
  • More expensive to maintain

The compound bow is definitely a powerful weapon and can be used in many applications. The modern design has helped bring a new generation of archers into the world. By enhancing this basic weapon with technological advances, it has brought this weapon into the present; it is no longer a weapon of the distant past.

Compound vs. Recurve Bows

So who wins the battle between the two types of bows? Neither! Both bows are strong and reliable contenders and are useful in their own ways. The recurve is the best for small game hunting, bow-fishing, and general use by a more advanced archer, whereas the compound bow is better for large game hunting, sea bow-fishing, and is popular with archers of all ages and skill level.